Creating An Edible Garden Landscape

Flowers grow and then they die, and you get little use out of them besides a pretty picture. But, now you can have edible landscape!

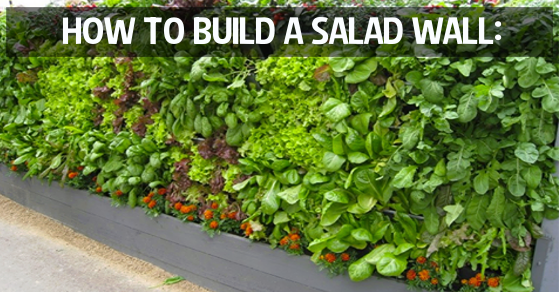
Edible landscaping incorporates food producing plants, shrubs and trees into urban and suburban landscapes. These landscapes can be a simple garden, raised boxes, or involve complex designs that incorporate dozens of varieties of edible fruits and vegetables. There are many benefits to landscaping with edible plants. Home-grown fruits and vegetables are the freshest and most flavorful.

You control what is used in your garden, you control the foods that are being planted, and you can easily avoid pesticides and herbicides. The edible landscape will save you money on groceries. While growing your own food, you are increasing the food security of the household and community. Winter is the perfect time to plan for you edible garden, think about what you want to plant and where.

First, you need to map out your yard, so you know just how much you have to work with. You should determine the orientation of your property and mark the amount of sun each area gets. This will help you decide what to plant and where. The sun’s position in the sky changes throughout the growing season.

Designing the bones of your garden is very important because the beds are more apt to have plants with a variety of textures, sizes, and shapes. Edible garden beds can be filled with young seedlings or can be empty. That’s when fences, hedges, and maybe a birdbath can be placed.

Next, you should plan the style of your garden by asking; do you want a formal or informal garden? Do you want a theme? After you have determined the setup of your landscape, it is time to choose the plants. This is where the true subtlety of the landscaper’s art lies. First, make a list of the edibles you want and note their cultural needs. Remember that not everything in your garden has to be edible. Next, all you have to do is get to planting and enjoy yourself and enjoy watching your plants grow and mature.


Sources:

http://www.motherearthnews.com/organic-gardening/edible-landscape-zmaz10onzraw.aspx

http://eatyouryard.com/services/landscaping/edible-landscaping/

http://www.garden.org/ediblelandscaping/?page=designing-your-landscape


Recipe ~ Maple Balsamic Quinoa Delight Salad

Maple Balsamic Quinoa Delight Salad

Quinoa is a nutritional powerhouse. Packed with fibre, carbohydrates, amino acids (the little structures that make up proteins), iron and b vitamins, this little pseudo grain is great if you are looking for a hit of usable energy.

It is much easier to digest and absorb than traditional grains like barley and wheat because it does not contain any gluten, and its chemical structure is much simpler. This salad is light, refreshing and tasty, but won’t leave you feeling hungry again within the hour.

Salad Ingredients:

½ cup dry quinoa
1 cup water
½ small beet, shredded
1 small carrot, shredded
½ small cucumber, sliced or diced
2 cups spring mix

Dressing Ingredients:

2 tbsp balsamic vinegar
1 tbsp maple syrup
1 tsp coconut oil
½ tsp mustard
pinch Himalayan salt
pinch pepper

Directions:

Place water in a pot over high heat. Bring to a boil. Add your quinoa and reduce heat to medium low. Cook until quinoa has absorbed water. Allow to cool. Combine cooled quinoa and remaining salad ingredients in a bowl or on a plate and set aside. Combine dressing ingredients in a personal blender or high speed blender and blend until smooth. You can also simply whisk dressing ingredients with a fork into a small bowl. Pour dressing over salad, toss and enjoy!

*Note: It can save you a lot of time to make the quinoa the night before and store it in the fridge!

Recipe ~ Sweet Pepper Panzanella

sweet pepper panzanellaPanzanella: it’s your excuse to eat bread and call it salad!

Ingredients

2-3 sweet peppers (red and/or yellow)
olive oil
sherry vinegar (or balsamic or white wine vinegar)
pinch of sweet or smoked paprika
toasted stale bread, rubbed w/ olive oil & garlic
1 cup cherry tomatoes
1-2 leaves of kale, torn
1/2 cup little mozzarella balls
1/4 cup chunky pickled onions (see below)
handful of torn basil
salt & pepper
pickled onions:
1 small red onion, sliced into thick strips
white wine vinegar (enough to fill the jar of onions)
a few pinches of cane sugar and salt

Instructions

For the pickled onions: (make in advance) pickle your onions by shaking all ingredients together in a jar. Chill until for at least an hour, or up to days (or weeks, really) in advance.


Slice cherry tomatoes and toss them with a splash of olive oil, a splash of sherry vinegar, salt, pepper.


Drizzle olive oil on your stale bread and toast (or grill) it until golden. While it’s still warm, rub it with a sliced clove of garlic, then slice it into bite sized pieces.


De-seed and slice your peppers into thick strips. Sautée them in a pan with olive oil until soft and lightly blistered. (you could also do this on a grill). Remove from heat, drizzle with a little sherry vinegar and a pinch of paprika.


Toss all salad ingredients together so that the juices from the tomatoes and the peppers create a light dressing. Drizzle with a little more olive oil. Taste, and add more salt and pepper to your liking. Let it sit for at least 10 minutes or so for the bread to soak up the juices. Serve at room temp.

Notes

Instead of pickled onions, you can also cook onions with your peppers. Use a yellow onion instead of a red one.

Vegan option:  skip the cheese

Yield: serves 3-4 as a side

Recipe ~ Blue Cheese & Walnut Stuffed Belgian Endive

endive

Ingredients:

  • 2/3 cup chopped walnuts
  • 4 tablespoons honey, divided
  • 2/3 cup dried cranberries
  • 1/2 cup of balsamic vinegar
  • 6 tablespoons orange juice
  • 32 Belgian endive leaves
  • 2/3 cup crumbled blue cheese, such as Roquefort cheese
  • 2 tablespoon minced chives

Directions:

  1. Preheat your oven to 350 degrees F.
  2. In a bowl mix together the walnuts, 2 tablespoons honey and 1/4 teaspoon of sea salt.
  3. Spread the mixture onto a baking sheet lined with parchment or aluminum foil.
  4. Pop the walnuts into the oven and allow to bake for 5 minutes, then stir and allow to continue to bake for another 5 minutes, for a total of 10 minutes, or until they are gold brown.
  5. While those are cooling combine your remaining 2 tablespoons of honey, balsamic vinegar, and orange juice in a small saucepan.
  6. Bring the mixture to a rolling boil, and then reduce the heat to a simmer.
  7. Allow this to cook until it has reduced down to 6 tablespoons.
  8. This will take from 7-10 minutes.
  9. Fill each endive leaf with 1 teaspoon each of the following: blue cheese, candied walnuts, dried cranberries.
  10. Arrange in a circular pattern on a tray.
  11. Now time for some abstract art fun; drizzle the reduced vinegar/honey/orange juice mixture over the endive leaves, and finish it with a sprinkling of chives and black pepper.