
Francine Christophe was born in 1933, the same year that Adolph Hitler took power in Germany. When she was eight years old, she and her mother were deported to the Bergen-Belsen concentration camp. In this interview for “Human,” a film project directed by photographer, Yann Arthus-Bertrand, she recounts an extraordinary tale of generosity at a time of great privation.
Tag: chocolate
Recipe ~ Ella’s Sweet Potato Brownies
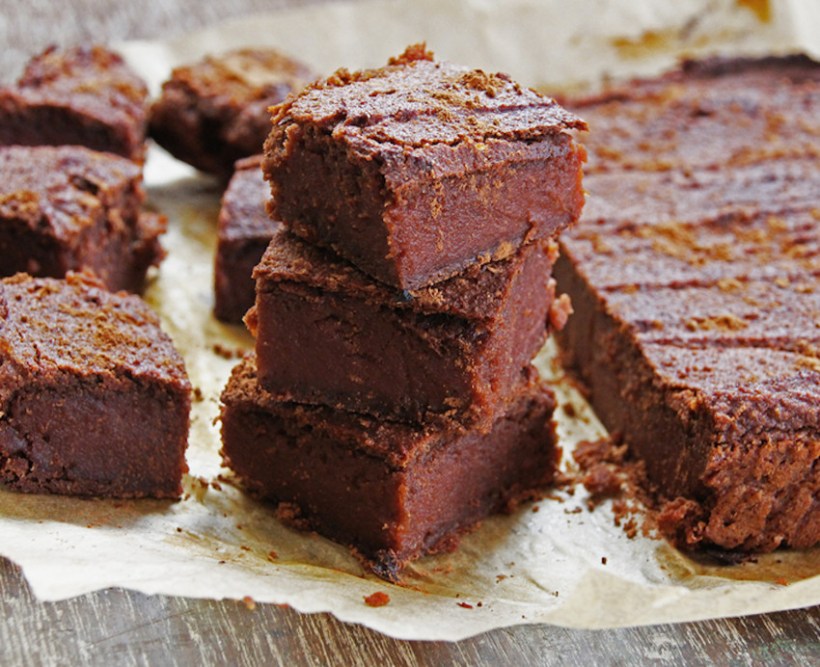
“Sweet potatoes are incredible: they’re bursting with nutritional goodness with all their antioxidants, and their anti-inflammatory properties, as well as being awesome blood sugar-regulators. Each cup contains an almost unrivaled amount of vitamin A, with more than four times your daily need of this antioxidant boosting vitamin, which is essential for strengthening your body’s immunity against infection.
Their bright color also doses you up on anti-inflammatories which have been shown to reduce inflammation on the brain and nerve tissue. Each serving also contains lots of wonderful fibre, which gives each brownies a ‘slow burning’ quality, meaning their energy is used up much more slowly than low-fibre carbohydrates – like normal brownies, so you’ll be fuller, more energized and more satisfied for way longer! So if you needed an excuse to eat brownies then here it is! They’re healthy!
Don’t forget that raw cacao is also a superfood as it is such an insanely rich source of antioxidants, one of the best in the world, as well as being packed with a number of other beneficial nutrients: manganese, which helps oxygenate the blood; magnesium, which helps maintain healthy bodily nerves, muscles and bones; and sulphur, which builds strong nails and hair, and promotes beautiful skin.” -Ella Woodward
Ingredients
Makes 10 brownies
- 2 medium to large sweet potatoes
- 2/3 of a cup of ground almonds
- 1/2 a cup of buckwheat flour (brown rice flour will also work)
- 14 medjool dates
- 4 tablespoons of raw cacao
- 3 tablespoons of pure maple syrup
- a pinch of salt
Preparation
1. Start by pre-heating the oven to 350ºF, then peel the sweet potatoes. Cut them into chunks and place into a steamer for about twenty minutes, until they become really soft.
2. Once they are perfectly soft and beginning to fall apart remove them and add them to a food processor with the pitted dates – this will form one of the sweetest, creamiest, most delicious mixes ever!
3. Put the remaining ingredients into a bowl, before mixing in the sweet potato date combination. Stir well.
4. Place into a lined baking dish and cook for about twenty minutes, until you can pierce the brownie cake with a fork bringing it out dry. Remove the tray and allow it to cool for about ten minutes – this is really important as it needs this time to stick together! Remove the brownies from the tray, leaving it another few minutes before cutting them into squares – then dig in and enjoy!
Source: Mind Body Green
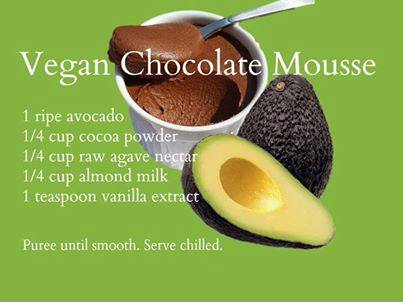
Recipe ~ Vegan Chocolate Mousse
Who said desserts can’t be healthy!?! This Vegan Chocolate Mousse is packed with superfoods, easy to make and completely satisfying when you have a craving for chocolate. For a fun twist, let it chill in the freezer for half an hour for a yummy frosty.
Day 7 (final) ~ 7-day Desserts and Snacks Challenge ~ Bliss Balls

Bliss balls are taking the health food world by storm lately, and most health food nuts have their own special recipe. While you may pay a premium price for one of these in stores or at your local health food restaurant, making them at home will not only save you money but will also give you an opportunity to create your own unique flavour combinations.
This is a super basic recipe that lends itself well to experimentation. Try adding in fun things like chopped dried fruits, other nuts, different extracts, citrus zests or even switching up the nut butters! Play around and have fun 🙂
Raw Bliss Balls (Makes 4-6 balls – can be frozen for 3-4 months)
Ingredients:
- ½ cup raw nut butter of choice
- 2 tbsp coconut butter
- 2 tbsp dried shredded coconut
- 2 tbsp chopped hazel nuts
- 6 medjool dates, pitted and chopped
- 1 tsp vanilla powder or extract
- pinch sea salt
- any add ins you like – chocolate chips, dried cranberries, raisins, carob chips etc.
Directions:
1. Blend dates and nut butter in a food processor or blender until smooth.
2. Transfer date and nut butter mixture to a bowl. Add remaining ingredients and combine with your hands. Your mixture should now form balls. If it is too crumbly add more nut butter. If it is too loose add more shredded coconut.
3. Form into 1 inch balls. Refrigerate until set. Enjoy!
Day 6 ~ 7-day Desserts and Snacks Challenge ~ Orange Chocolate Fudge
 Have you ever had orange flavoured chocolate? I know that the combination may sounds a little strange at first, but trust me when I say that the bright, clean and crisp flavours of citrus really adds a special sparkle to the natural earthiness of chocolate.
These fudge squares are much easier to make than traditional fudge, and does not require a candy thermometer or precise temperatures. All you need to do is melt a little chocolate, blend a few other ingredients, mix and you’re good to go!
I know that the instructions tell you to wait until this glorious mixture is cooled and set before consuming, but if you are a little too impatient to wait for that, we will understand.
Orange Chocolate Fudge
Ingredients:
- 2 cups dry shredded coconut
- 2 cups vegan chocolate chips
- ¼ cup almond milk
- 1 orange, zested then peeled
- 2 cups Fresh dates, pitted and chopped
- ½ cup cocoa powder
- 1 tsp vanilla powder or extract
- 1 tsp cinnamon powder
- pinch sea salt
Directions:
1. Line 6×6 baking dish with parchment paper.
2. Place cocoa powder, salt, vanilla and cinnamon powder in a bowl and combine. Zest orange zest into cocoa powder mixture. Peel orange and discard the peel.
3. Place coconut in high speed blender and blend until a smooth butter forms. Add your peeled orange and dates. Continue to blend until well combined. Add to your cocoa powder mixture
4. Place a small pot with 1-2 inches of water over high heat. Place a glass or metal bowl over the pot, making sure that the water does not touch the bowl. Add chocolate chips and almond milk and melt chocolate until fully melted. Stir melted chocolate into coconut orange date mixture.
5. Mix well then transfer to lined baking dish. Place in freezer for a few hours. Slice and enjoy!
6. Makes 1 6×6 baking dish worth. Can be frozen for several months.
Recipe ~ No-Bake, Gluten-Free Chocolate Chip Cookies (Just 5 Ingredients!)
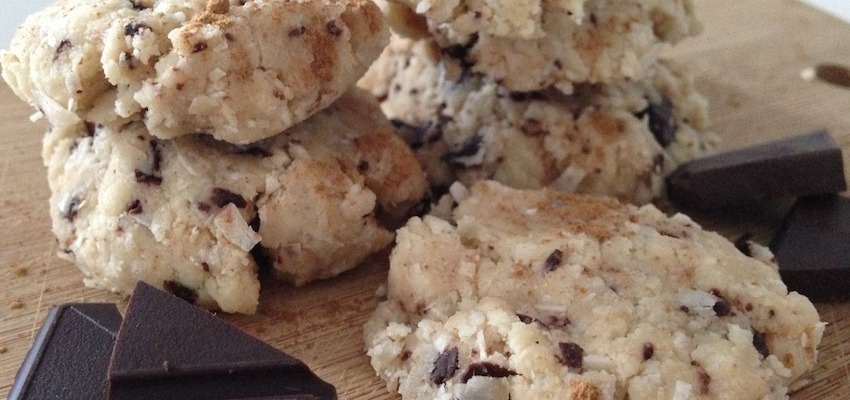
Raw cookies anyone?
This recipe is ridiculously simple and healthy. Your kids (and you) will love it.
No-Bake, Gluten-Free Chocolate Chip Cookies
Ingredients
- 1 cup coconut flakes
- 1.5 cups almond meal
- 4 tablespoons coconut oil, melted
- 2 squares of your favorite dark chocolate, diced in small chunks
- 1/2 teaspoon cinnamon
Preparation
1. Add almond meal, cinnamon and chocolate chunks into a mixing bowl.
2. Blend coconut flakes in a high speed blender until mealy, then add to the bowl with the almond meal mixture. Mix well with your hands or a spoon.
3. Add the melted coconut oil and mix with your hands until you get a slightly sticky texture. Then, using your hands, create four balls with your paste and carefully press them on a plate with your hand. Place in the fridge for a couple of hours to set.
NOTE: If you want these a bit sweeter, add a teaspoon of coconut sugar. Makes about 4 cookies.
Day 2 ~ 7-Day Snack and Dessert Challenge ~ Toasted Coconut Truffles
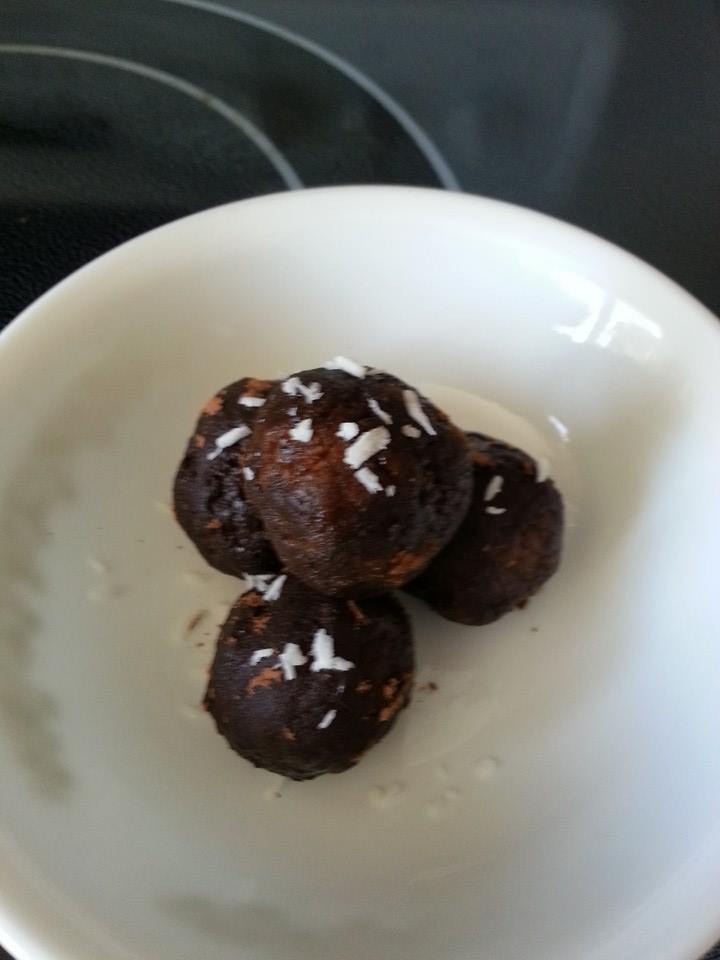
In our world, you should be able to have your chocolate and have your health too! These toasted coconut chocolate truffles are just what the doctor ordered if you are looking for something dense and satisfying that won’t totally weigh you down.
You may also be pleasantly surprised how flavourful these truffles are even tough they only contain 5 simple everyday ingredients. Enjoy these with a nice cup of tea at the end of your day, or as a pick me up snack during your day, or both!
Ingredients:
- 3 cups dried shredded coconut
- 3 cups Fresh dates, pitted and chopped
- ½ tbsp coconut oil
- pinch sea salt
- cacao or cocoa or carob powder to coat
Directions:
1. Preheat oven to 350 degrees. Line a baking tray with parchment paper. Place coconut in an even layer on baking tray and bake for 10-15 minutes or until coconut is brown and toasted. Be sure to watch it as it can go from brown to black in a very short time!
2. Remove coconut from the oven and transfer to a high speed blender or food processor. Blend with coconut oil until a smooth butter forms.
3. Add pitted chopped Fresh dates and process again until thick mixture forms. It is OK if the dates don’t get full blended in, having a few date pieces in your truffles can be tasty!
4. Remove mixture from blender and let cool in the fridge for 15 minutes.
5. Roll your mixture into 1 inch balls and coat in cacao, cocoa or carob powder.
6. Place on lined baking tray and cool in the freezer or enjoy as they are!
Recipe ~ Filipino Champorado (Chocolate Rice Pudding)

Champorado, also called chocolate rice, is versatile. Jun Belen, an Oakland, California–based cook and food photographer, grew up eating it for breakfast on chilly winter mornings in Manila, with pan de sal (soft, buttery rolls) and fried salt fish. He also ate it chilled as an after-school snack with evaporated milk poured over the top. We prefer our champorado made with good-quality bittersweet chocolate and served warm as a luxurious ending to a meal.
What to buy: Since this recipe contains so few ingredients, be sure to use good-quality chocolate. Missouri-based bean-to-bar company Askinosie imports single-origin cacao from Davao in the southern Philippines and produces a 77-percent bittersweet chocolate with earthy and slightly smoky flavors that really shine through in this simple recipe.
Although rice does not contain any gluten, short-grain sweet rice is sometimes labeled as glutinous rice or sticky rice and can be found in the Asian aisle of most grocery stores.
Game plan: The liberal garnish of rich evaporated milk is traditional, but feel free to substitute regular whole milk or half-and-half.
INGREDIENTS
- 6 ounces bittersweet chocolate, coarsely chopped
- 1 cup short-grain sweet rice, also known as sticky rice
- 5 cups water
- 1/3 cup granulated sugar
- 3/4 cup evaporated milk
INSTRUCTIONS
- Create a double boiler by filling a pot with 2 inches of water and bringing it to a simmer over medium-low heat. Place the chocolate in a heatproof bowl and set it over the pot. (Do not let the water touch the bottom of the bowl.) Stir continuously until the chocolate is completely melted and smooth. Remove from the heat and set aside.
- Place the rice in a fine-mesh strainer and rinse it under cold water until the water runs clear. Transfer the rice to a medium saucepan, add the measured water, and bring to a boil over medium heat. Reduce the heat to low and simmer, stirring occasionally, until the rice is tender and the mixture thickens, about 15 minutes.
- Add the sugar and melted chocolate to the rice, whisk to combine, and return to a simmer. Continue to simmer, stirring occasionally, until the sugar has dissolved, about 2 to 3 minutes. Remove from the heat and set aside until the pudding has cooled slightly but is still warm, about 45 minutes. (At this point, you can cool the champorado completely, transfer it to a container, cover, and refrigerate for up to 3 days.)
- Spoon the champorado into serving bowls and drizzle each with evaporated milk.
Health ~ The Magic that is Chocolate
 We are constantly trying to restrict what we eat. Every day we hear about yet another food we should cut out completely, or we get berated for not catching onto the latest food fad fast enough. One of the recurring stories in the food tabloids is the evil of sugar, and while it is true that in general the overall sugar consumption of the human race has increased exponentially and no doubt has adverse effects of our health, it has also meant the defamation of less guilty subject, chocolate.
Mmm. Chocolate.
Unfortunately much of the chocolate that we find on the market today is not chocolate at all, but rather a flimsy syrupy substitute masquerading as the real thing. This trite treat has lost all of its original zest and surely too its mystique. Chocolate originated in the foothills of the Andes, in the Amazon and Orinoco basins of South America. The cocoa bean was deemed so valuable that it was used as a common currency before the Spanish conquest. Montezuma the Second, Emperor of the Aztec civilization (the story goes) drank nothing but chocolate. He enjoyed his royal beverage in a golden goblet, whipped into a mouth-watering froth and flavored with vanilla and spices. It wasn’t long before chocolate was introduced to the Europe, and it was soon revered as the delicacy among delicacies. Revered isn’t too strong a word either: chocolate’s Latin name, Theobroma Cacao literally means “food of the gods”.
The reason why chocolate was so highly regarded was the titillating sense of elevation that people originally experienced when partaking (and its ability to act as a powerful aphrodisiac was presumably also well noted). Today we know that the stimulating effects of chocolate come from the compound Theobromin, and that chocolate is a rich source of antioxidants which may well have anti-aging properties. Chocolate also contains high levels of flavonoids which are said to have a positive effect on the heart.
Recent studies done on the Kuna people, who consume large amounts of cocoa as part of their daily lives, found that they have significantly lower rates of heart disease and cancer, which should be unsurprising, as it has been linked to a reduction in blood pressure. The benefits of cocoa are even believed to extend to the brain’s abilities to learn and remember.
With all these incredible benefits at our chocolaty fingertips, it’s a wonder we don’t consume more of this charmed stuff. And after you tire of the cheap imitations, you’ll find that raw cocoa and dark chocolate products are readily available, and that they open up a whole new range of decadent culinary experiences. For instance, try adding a scoop of raw chocolate to your morning porridge. Chocolate can even be grated over salads, and adds a sensuous depth of flavor to a humble stew.
And the moral of this decadent tale? Don’t deprive yourself of the chance to savoir this godly delicacy, and say yes to the magic that is chocolate.
Recipe ~ Raw Chocolate Treats
 These taste great with a cup of your favorite organic coffee, or whenever you want a nutritional chocolatey pick-me-up. The cacao and dates are chock-full of vitamins and minerals and are sugar, dairy and nut-free. And the best part? They don’t melt in your bag, so you can take them with you and enjoy them while you travel.
Ingredients
3/4 cup raw cacao powder
1/4 cup of melted cacao butter
2 Tbsp. agave nectar
1/4 cup pitted dates, roughly chopped
2 Tbsp. unsweetened dried cranberries
2 Tbsp. sunflower seeds
1 Tbsp. unsweetened shredded coconut
Directions
Melt the cacao butter on the stove over very low heat. To avoid burning the butter, you can create a makeshift double boiler. Put a little hot water into a metal pot or bowl and then use another smaller metal bowl or metal cup for the solid chunks of cacao butter. Place the smaller metal cup into the larger bowl, and try to be sure that not one drop of water enters the cup with the butter in it. Gently stir the cacao butter while it heats up.
Remove the melted cacao butter from heat and pour into a large mixing bowl. Add the cacao powder and agave nectar and mix thoroughly and quickly. Next add in approximately half of each of the dry ingredients and stir. You will need to be quick with this step to ensure it is mixed well.
On a sheet of baking paper spread out the mixture into an even thickness into the shape of a rectangle. Put a second sheet of baking paper on top and press down firmly on the mixture. You can use a rolling pin if you have one or just give yourself an arm workout by pressing down on the mixture with your hands.
Take off the top layer of baking paper and add the rest of the dry ingredients on top of the mixture.
Fold the edge of the bottom sheet of baking paper towards the centre of the mixture, to roll the mixture over itself (a bit like rolling sushi). Be sure to press down firmly to keep the mixture warm with the body temperature from your hands and to keep the mixture sticking together. Roll until you have a nice fat tube created, and be sure to pull the tube away from the baking paper as you roll.
Alternatively you can roll the outside of the tube across a plate of shredded coconut.
Pop the chocolate tube into the fridge for an hour to make sure it’s nice and hard. This will make it easier to cut into the thickness of rounds that you prefer using a sharp straight edged knife.
Store in a container with a lid and pop a few in a sandwich bag when you’re ready to hit the road. Safe, healthy travels!
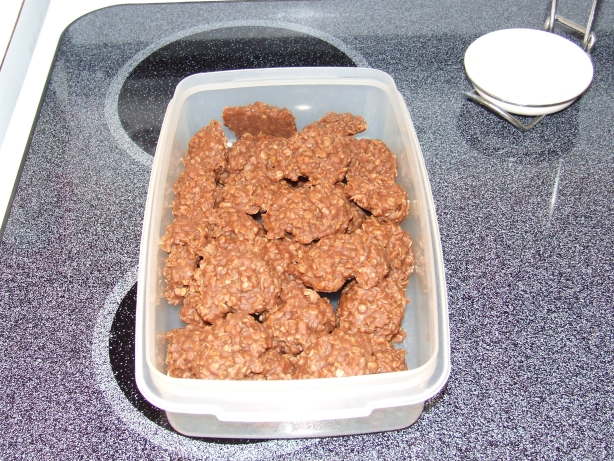
Recipe ~ No-Bake Chocolate Oatmeal Cookies
Ingredients:
1/2 cup butter or 1/2 cup margarine
2 cups sugar
1/2 cup milk
4 tablespoons cocoa
1/2 cup creamy peanut butter (or chunky but is seems to make a more crumbly dry cookie)
2 teaspoons vanilla
3 -3 1/2 cups dry quick-cooking oats
Prep Time: 5 mins.
Cook Time: 1 min.
Directions:
1 – Add the first four ingredients into a 4-quart sauce pan.
2 – Bring to a rolling boil and hold for 1 minute.
3 – Remove from heat.
4 – Add peanut butter into the hot mixture and stir until melted.
5 – Add in vanilla. (almond extract is good also, but I only use 1/2 teaspoon almond and 1 1/2 teaspoon vanilla).
6 – Mix in the oats and drop by tablespoons onto wax paper.
7 – Let cool until set.
8 – *Please remember that even if you do follow the recipe exactly, it doesn’t always turn out just right. I have had these not set up for me AND be hard and dry. But most of the time, the recipe is just right. I have also found that it makes a difference if you use quick cooking oats or old fashioned. In my experience it takes more old fashioned oats than quick cooking and I like the texture of the quick cooking better. When you make it a few hundred times like I have you learn a couple of things:) Also, Chunky peanut butter tends to make them more dry and crumbly.
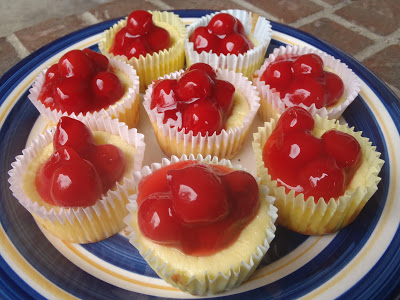
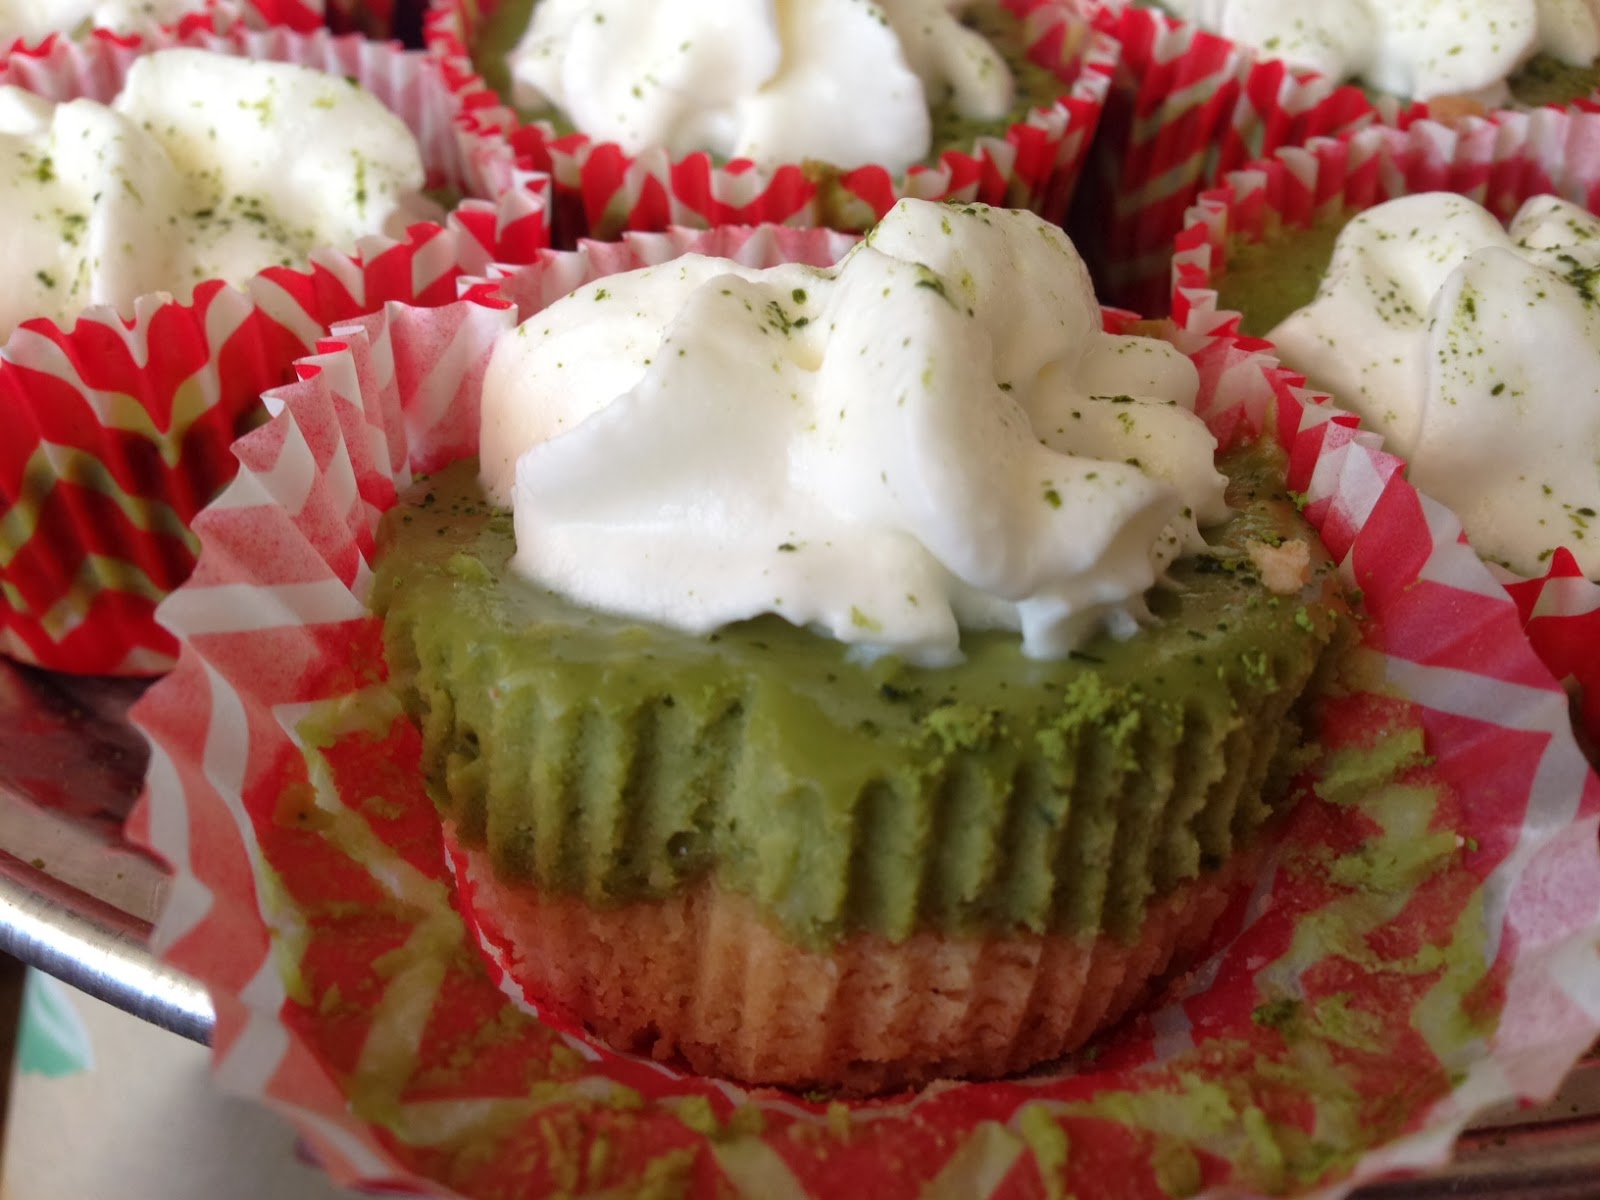
Recipe ~ Three Mini Cheesecakes

Ingredients
Cheesecake Base:
2 packages cream cheese
3/4 cup sugar
1 teasppon vanilla
2 eggs
Toppings/crusts
For fruity Cheesecake:
Nilla wafers for crust
1 can blueberry or cherry filling
For chocoholic Cheesecake:
Oreos for crust and to crumble on top
Chocolate Pudding/milk for topping
For Matcha Cheesecake:
1 1/2 Tablespoons Match Green Tea Powder (Sold online)
1/2 recipe of Shortbread cookie for crust
Directions
- Preheat oven to 350 degrees.
- Beat cream cheese, eggs, vanilla, and sugar with mixer.
- Place 1 vanilla wafer/oreo/cookie (if doing shortbread crust pre-bake for 10 minutes) on the bottom of each cupcake liner (make 18).
- Pour batter on top of cookie.
- Bake for 15 minutes.
- Chill then top with filling/pudding and oreo crumbs/whipped cream! YUM
Makes 18 mini cheesecakes.
Recipe ~ Chocolate Haupia Pie
Ingredients:
1 frozen pie crust (small)
1 cup sugar
1 cup milk
1 can coconut milk
1 cup water
½ cup cornstarch
7oz. semi-sweet chocolate
1½ cups heavy whipping cream
¼ cup sugar
Instructions:
Preheat oven at 350 degrees.
If using a frozen pie crust. Prepare pie crust according to directions.
Whisk the following ingredients: sugar, milk and 1 can coconut milk.
Next, stir water into cornstarch and set aside.
Pour coconut milk mixture into sauce pan and bring to a boil, then turn heat lower to a simmer and whisk in cornstarch continually until thickened.
Melt chocolate pieces in a microwave for just a minute.
Separate the haupia mixture equally. Pour half the mixture into the melted chocolate and stir together and fill bottom of pie crust. The other half pour on the top of mixed chocolate.
Refrigerate the haupia pie for at least 1 hour.
Whip heavy cream with remaining sugar until peaks are formed and add to pie.
Refrigerate for another hour and enjoy!
Chocoholic’s Paradise ~ Abbot Kinney Part II: ZenBunni

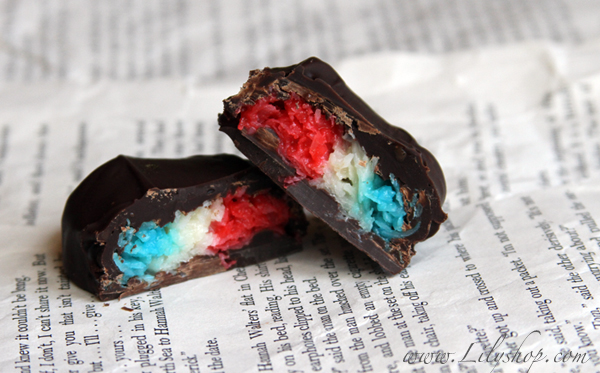
Recipe ~ Fourth of July “Mounds” Bars
Ingredients:
(1) 7 oz bag sweetened shredded coconut
7 oz sweetened condensed milk
(1) 12 oz bag dark chocolate chips
Food Coloring
Directions:
1. Combine one 7 oz bag of sweetened shredded coconut with 7 oz of condensed milk. Mix well.
2. Separate your mixture into 3 different bowls. Put the same amount in each bowl and add red food coloring to one bowl and blue to the other. The white obviously stays as is. The blue will only need about 2 drops but the red will require more otherwise it will be pink. If you have food coloring gels these work well. Refrigerate all the mixtures for 1 hour.
3. Remove your bowls from the refrigerator and start preparing 2 inch mounds on a lined baking sheet. I think it’s best to use a Silpat but if you do not have a Silpat, use wax paper. I did one color at a time then washed my hands and moved on to the next color so the colors did not bleed together.
4. Using a damp paper towel, cover your bars and shape them with your hands. Refrigerate for another 2 hours.
5. Once your bars are completely cold you need to melt your dark chocolate chips in a double boiler or in the microwave. Now there are two ways to melt your chocolate. If you melt your chocolate in the microwave at 30 second intervals (stirring in between) like I normally tell you to do, your chocolate will be more soft and malleable; meaning, if you leave these these candies out all day, the chocolate will start to melt a bit and it will get all over your hands. If you want your chocolate to be hard (like when you buy a box of candy) you will need to temper your chocolate. Once your chocolate is melted you will want to dip your bars into the melted chocolate and place back on the lined tray. This is totally messy and there is no other way to do it. Refrigerate for another 2 hours.
Tip: If you want your bars to look smoother you can dip them again and do a second coating of chocolate and then refrigerate once again. The bars pictured here were double-dipped. Enjoy!
Recipe ~ Triple Coconut Chocolate Cookies (vegan, gluten-free)

Ingredients for the cookies
- 1 Tbsp. ground flaxseed
- 1/4 cup coconut flour
- 3/4 cup all purpose gluten-free flour
- 2 Tbsp. shredded coconut
- 1 tsp. baking powder
- dash of salt
- 1/4 cup coconut oil, softened
- 2-3 Tbsp. agave
- 2 tsp. vanilla extract
Ingredients for the coconut icing
- 1/4 cup coconut butter
- 1 Tbsp. agave
- 1/4 tsp. vanilla extract
Ingredients for the chocolate sauce
- 2 Tbsp. agave
- 2 Tbsp. cocoa powder
Directions
Preheat oven to 325° Fahrenheit. Grease a baking sheet or line it with parchment paper.
Prepare flax “egg” by mixing ground flaxseed with 3 Tbsp warm water. Let sit for 10 minutes.
In a large bowl, combine coconut flour, all-purpose flour, shredded coconut, baking powder and salt
In a small bowl, combine coconut oil, agave and vanilla. Stir wet ingredients and flax “egg” into large bowl until thoroughly mixed.
On a clean surface, use a rolling pin to roll batter out until it’s about 1/4″ thick. Use a circular cookie cutter (a jar lid works well) to cut cookie shapes. Transfer cookies to baking sheet and bake for 9 to 11 minutes, until edges are golden.
While cookies bake, prepare coconut icing by mixing coconut butter, agave and vanilla together. Prepare chocolate sauce by mixing agave and cocoa powder together.
Remove cookies from oven and allow them to cool. Spread a layer of coconut butter on each cookie and drizzle with chocolate sauce. Sprinkle extra shredded coconut on top. Enjoy!
Makes about 15 cookies
Food: Cookies ‘n’ Cream Parfaits

(Makes about 6 servings in 6 ounce glasses, or 4 servings in 10 ounce glasses)
Ingredients:
16 fl oz whipping cream, cold
2 tablespoons sugar
2 (16 ounce) tubs all natural Belgian chocolate pudding*, divided use
24 all natural chocolate-vanilla sandwich cookies*, crushed into chunky consistency
1 (1ounce) square semi-sweet chocolate, to shave for garnish
Preparation:
-In the bowl of a mixer (or using a hand-held), add the cold cream and begin whipping; once thickened slightly, sprinkle in the sugar and finish whipping just until stiff peaks form; set aside for a moment.
-In medium-large bowl, add 2 cups of the chocolate pudding (reserving the remaining pudding) and begin adding the whipped cream to it in several increments, gently folding in to keep a fluffy and light consistency, as this is the “chocolate mousse” part of the dessert; once all whipped cream is incorporated, set aside and prepare glasses.
To Assemble (for 6 servings in 6 ounce glasses):
-Begin by adding equal amounts of the crushed cookies to the bottom of each glass (about 3 tablespoons), next a layer of chocolate pudding (about 3 tablespoons), and next a layer of the “chocolate mousse” (about 3 tablespoons); repeat this process again for each glass, with another layering of crushed cookies, then the pudding, then the “chocolate mousse”, finally finishing with a final sprinkling of crushed cookies and a decorative dollop of “chocolate mousse”; garnish by shaving a little of the semi-sweet chocolate square with a vegetable peeler over the tops of each glass; refrigerate until ready to serve, or serve immediately.
To Assemble (for 4 servings in 10 ounce glasses):
-Follow assembly instructions above only increase the quantity of each layer to about 5 tablespoons in order to fill each glass.
*Trader Joe’s “Belgian Chocolate Pudding” (or any “ready made” chocolate pudding) and “Chocolate-Vanilla Bean Joe-Joe’s” Sandwich Cookies.
RECIPE ~ Chocolate Martini Pudding Pops

Yeah, you heard that right. Chocolate Martini Pudding Pops. Bring on the heat. Bring on the raging dog days of summer, the long mountain bike rides, and all the sweat. Because when you have a batch of these rich chocolate frozen treats waiting for you at home, it’s all worth it.
Ingredients:
1 3.9oz package jello
1 cup whole milk
1 cup heavy cream
1 tbs Godiva liqueur
3 tbs vodka
Preparation:
In a large mixing bowl, whisk together the pudding, milk, cream, Godiva liqueur, and vodka.
Carefully portion mixture into popsicle molds, filling each three quarters of the way full.
Place in freezer for one hour, or until slightly firm and add craft sticks in the center of each pop and et freeze overnight, or until solid.
RECIPE ~ Double Chocolate Cherry Smoothie

Ingredients:
- 1 and 1/2 cups unsweetened chocolate almond milk
- heaping 3/4 cup frozen cherries
- 2 Tbsp unsweetened cocoa powder
Directions:
- Pour the milk into your blender. Add in the cherries and cocoa and turn on low. Let the smoothie run on low for a minute, then bump the speed up to medium for about a minute until the mixture is smooth and you don’t hear any more large chunks of cherries being hit by the blades.
- Pour the smoothie into a glass and serve immediately.
Read more at http://www.branappetit.com/2013/06/05/double-chocolate-cherry-smoothie/#fRGPYWF2mdB0tw4H.99
RECIPE ~ Decadent Chocolate Tart (Raw Vegan/Gluten-Free)
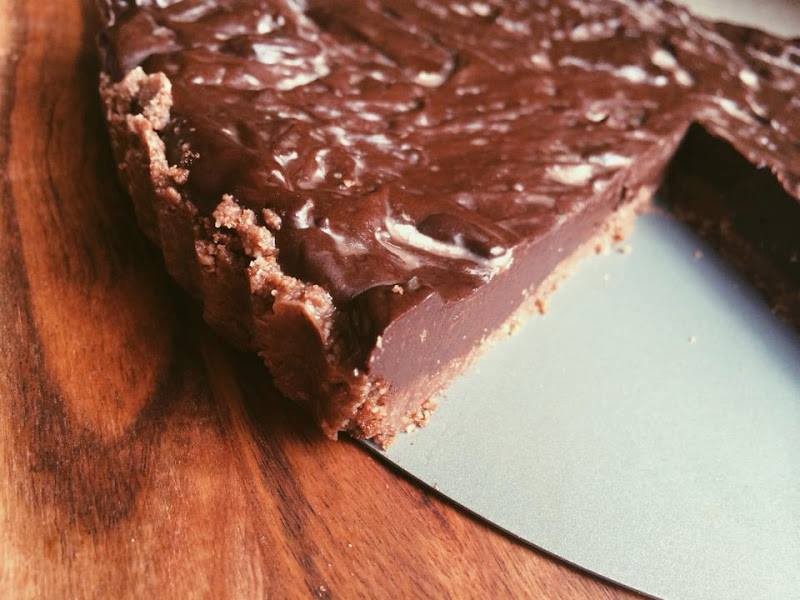
We’ve all heard by now how good coconut oil is for us. It’s one of my core ingredients in many sweet recipes. This decadent chocolate tart is dairy free, gluten free, sugar free and raw. It also won’t give you a nasty sugar spike and crash like many other “clean” desserts, which are laden with hidden sugars.
Ingredients for crust
- 1 1/2 cups almond flour
- 3 Tbsp. brown rice malt syrup
- 3 Tbsp. coconut oil
- 1⁄4 cup raw cacao powder
- pinch Himalayan sea salt
Ingredients for filling
- 1⁄2 cup raw cacao powder
- 3 Tbsp. coconut oil
- 1 cup brown rice malt syrup
- pinch Himalayan sea salt
Directions
For the crust, process all ingredients until blended, and press into the bottom and sides of a tart tin.
Freeze the tin while you prepare the filling.
Process all filling ingredients until combined and smooth.
Remove crust from freezer and pour the filling mixture into the crust.
Return to freezer until the mixture is set (at least an hour).
Remove 5 minutes before serving, and return any leftovers to refrigerator.
Adapted from the Coconut Oil: 50 Recipes for Inside + Out eBook
