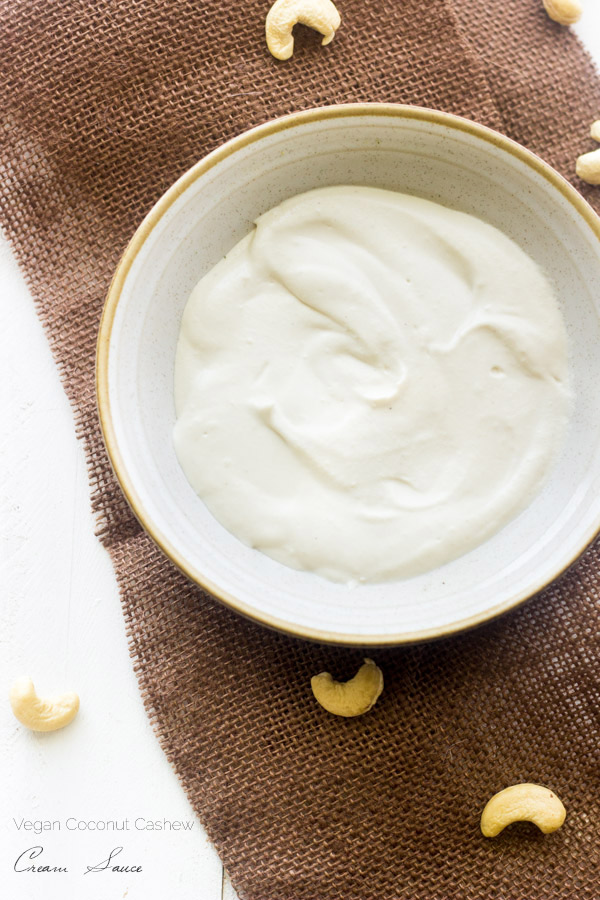
There are only 3 ingredients and it takes like 2 minutes.
Cashew cream is basically a yummier, healthier, vegan-er way to get your cream sauce fix. If you want it less “nutty” tasting, just don’t toast your nuts before-hand. E Z. ENJOY!
There are only 3 ingredients and it takes like 2 minutes.
Cashew cream is basically a yummier, healthier, vegan-er way to get your cream sauce fix. If you want it less “nutty” tasting, just don’t toast your nuts before-hand. E Z. ENJOY!
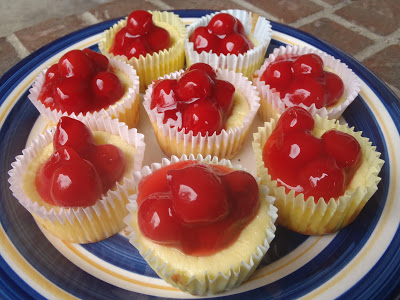

Cheesecake Base:
2 packages cream cheese
3/4 cup sugar
1 teasppon vanilla
2 eggs
Nilla wafers for crust
1 can blueberry or cherry filling
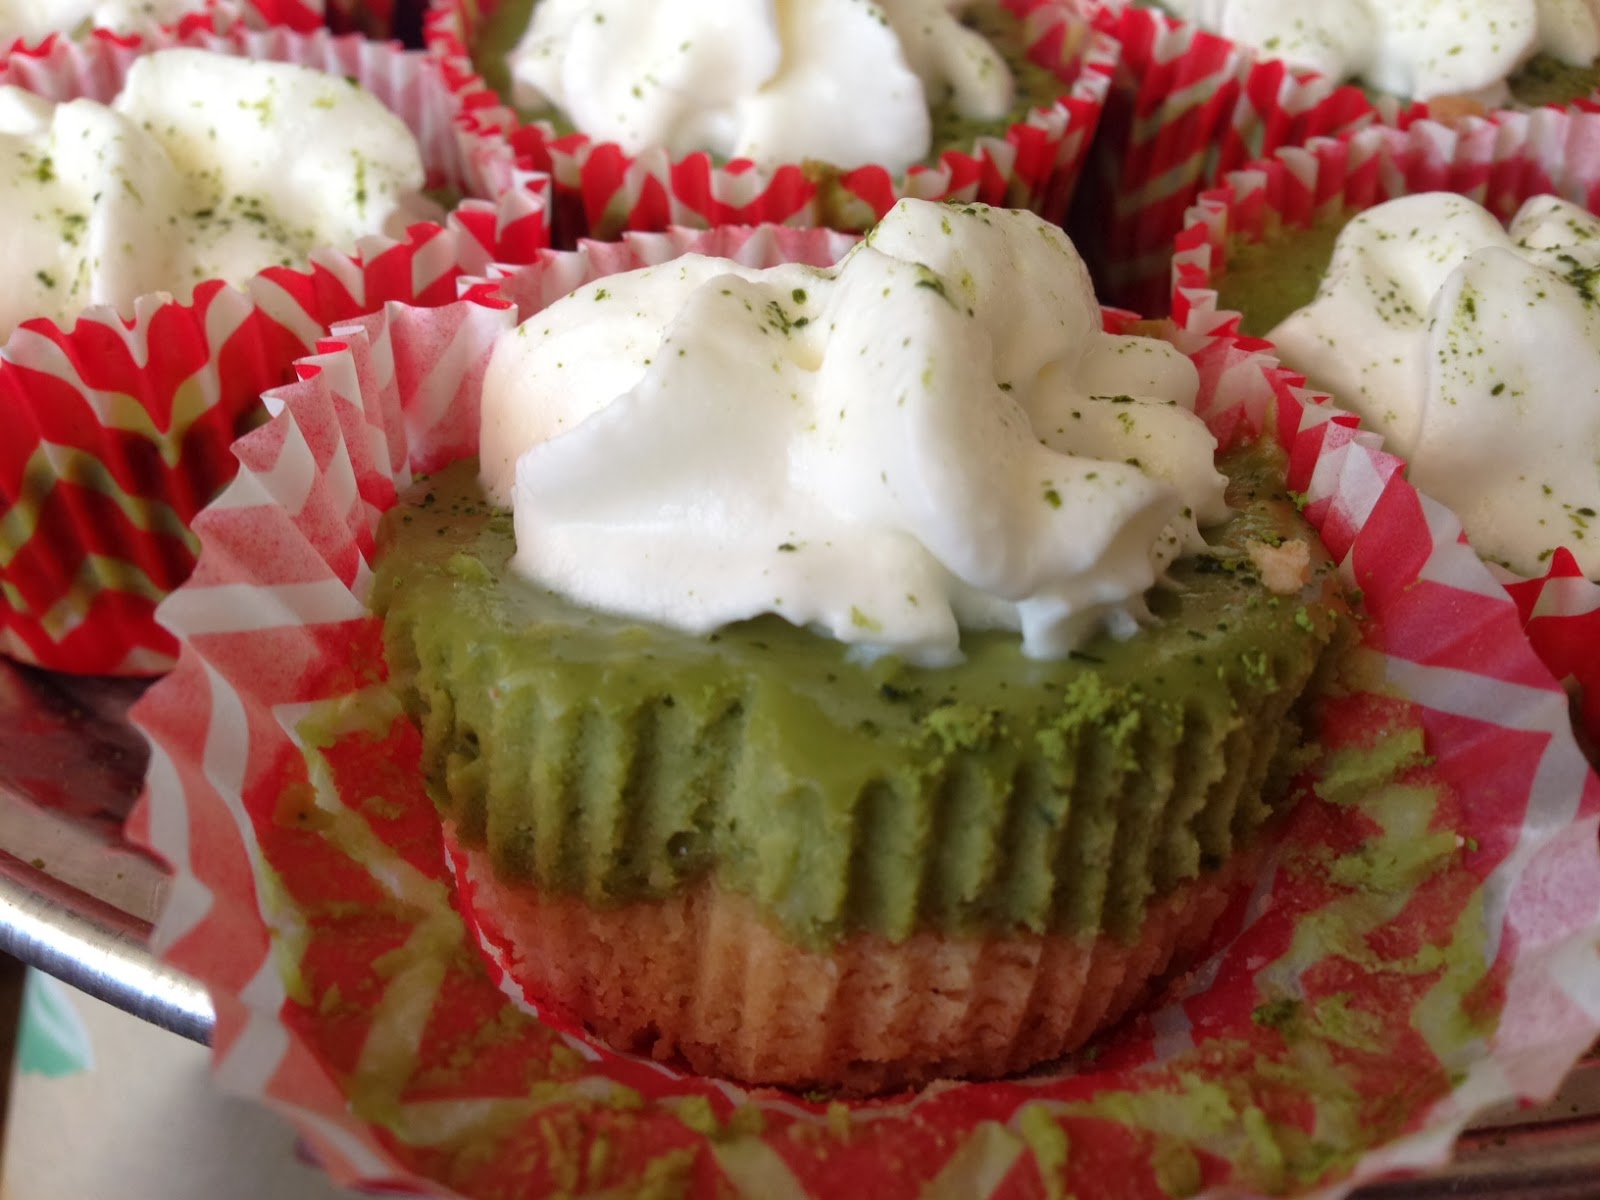
Oreos for crust and to crumble on top
Chocolate Pudding/milk for topping
1 1/2 Tablespoons Match Green Tea Powder (Sold online)
1/2 recipe of Shortbread cookie for crust
Makes 18 mini cheesecakes.

(NaturalNews) An increasing number of people in the world today are becoming intolerant to gluten, which is a specific protein found in wheat, rye and barley. Sensitivity to the gluten protein now affects roughly 18 million Americans. This growing problem has given rise to an ever-expanding industry of “gluten-free” products. In recent years, the “gluten-free” label has become an advertising ploy, backed by little accountability. Now, the FDA is getting involved, announcing new regulations to enforce the meaning of the “gluten-free” label.
Then again, if you are informed about the hazards of milk, especially homogenized, pasteurized, loaded with hormone and anti-biotic milk, this comes as no surprise.
I personally gave up drinking milk a long time ago. I do occasionally have some cheese or butter, but certainly not everyday.
I have several friends who have an allergy to dairy. This is beyond just lactose intolerance. What about the proteins that are in the milk?
There are a lot of people who might have an issue with milk sensitivity and don’t even realize it. For a self experiment, I am going to avoid dairy for 3 weeks. That means cutting out cheese, yogurt, butter and all milk products. That means reading food labels carefully.
Personally, I haven’t had a glass of milk in over a decade. I haven’t missed it one bit.
Milk is not the only source of calcium on the planet. This list of calcium containing foods contains some good healthy options.
Milk is certainly on the “Acidic” side of the alkaline diet chart.
Goat milk product are a better option for some people. Others are better off giving up milk and dairy altogether. Sometimes self experimentation is the best way to figure out just what is right for you.
Raw Goat Milk is slightly alkaline. Almond Milk is an excellent alkalizing choice. Almond milk also has much less chance of food allergy/sensitivity issues.
Check out what Dr. Hyman has to say about dairy and inflammation on the Dr. Oz show.
 Just three ingredients is all you’ll need to make this shortbread crust. They are most likely ingredients that you already have stocked in your pantry, too! Flour, sugar, and butter. Just those three things make one of the most delicious crusts that is versatile for so many delicious desserts and sweet treats.

(Serves 2)
Ingredients
Toppings
Directions
Blend all ingredients into your high-speed blender until well combined and serve with your favorite toppings.
Here I’ve used pistachios, hemp seeds and cacao nibs for toppings.
 This dessert takes around five minutes to prepare and less than 30 minutes to set. It’s perfect if you have a craving for chocolate or you have unexpected guests turn up.
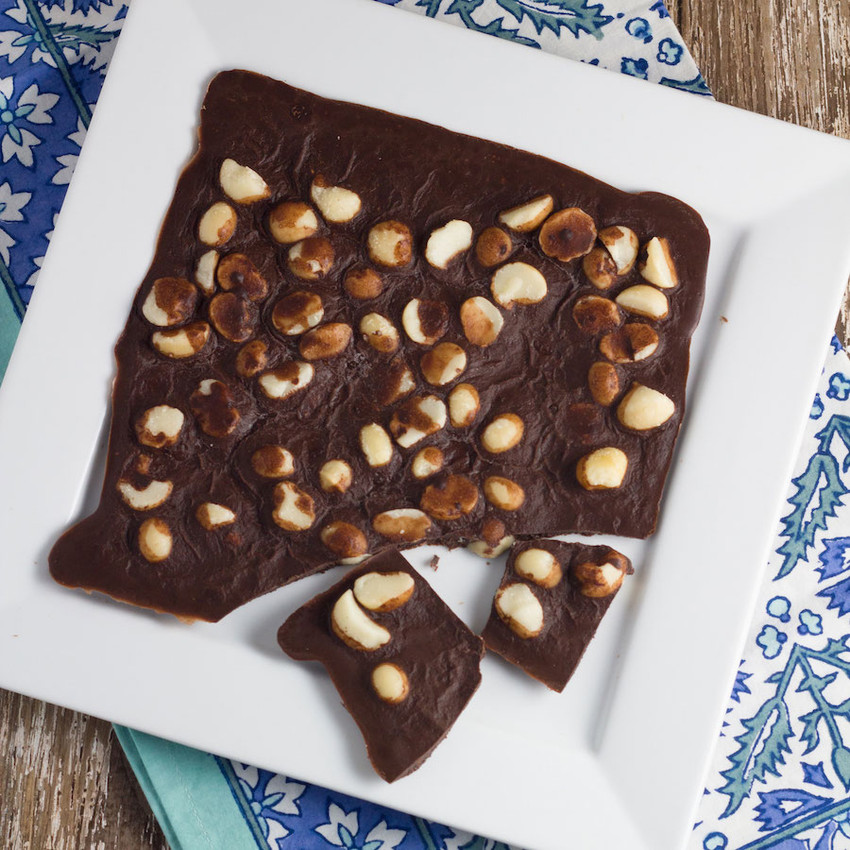
Vegan Macadamia Chocolate Bark
Serves 8
Ingredients
Directions
Line a plate or baking tray with baking paper, place the macadamia nuts on top.
Add coconut oil to a small saucepan on low heat and stir until melted.
Remove from the heat and add the organic maple syrup, whisking briskly until well combined.
Add the cacao powder, stirring until well combined.
Pour the chocolate over the macadamias, ensuring that they are evenly coated.
Place in the refrigerator or freezer to set for 20-30 minutes.
Take out and break apart to serve.
Ingredients:
1 frozen pie crust (small)
1 cup sugar
1 cup milk
1 can coconut milk
1 cup water
½ cup cornstarch
7oz. semi-sweet chocolate
1½ cups heavy whipping cream
¼ cup sugar
Instructions:
Preheat oven at 350 degrees.
If using a frozen pie crust. Prepare pie crust according to directions.
Whisk the following ingredients: sugar, milk and 1 can coconut milk.
Next, stir water into cornstarch and set aside.
Pour coconut milk mixture into sauce pan and bring to a boil, then turn heat lower to a simmer and whisk in cornstarch continually until thickened.
Melt chocolate pieces in a microwave for just a minute.
Separate the haupia mixture equally. Pour half the mixture into the melted chocolate and stir together and fill bottom of pie crust. The other half pour on the top of mixed chocolate.
Refrigerate the haupia pie for at least 1 hour.
Whip heavy cream with remaining sugar until peaks are formed and add to pie.
Refrigerate for another hour and enjoy!

Yield: 1 10″ Brownie
Prep Time: 10 Minutes
Cook Time: 30 Minutes
Total Time: 40 Minutes
Ingredients:
1/2 cup Butter, melted and cooled
3/4 cup Nutella, or chocolate hazelnut spread
1/2 cup Brown Sugar or Coconut Sugar
1/2 cup Sugar
2 Eggs
1 tsp Vanilla
1 tsp Baking Soda
1/2 tsp Salt
2 cups Flour
2 Tbsp Cocoa Powder
1 cup Semi-Sweet Chocolate Chips
1/2 cup Toffee Pieces, like Heath Bits o’ Toffee
Directions:
Preheat oven to 350 degrees. In a large bowl with a whisk or spatula, butter, Nutella, brown and white sugar, eggs, and vanilla until smooth. Stir in the flour, salt and baking soda until a batter forms.
Stir in 3/4 of the chocolate chips and 1/4 cup of the toffee pieces.
Spoon the batter into a oven proof skillet, cast iron or stainless steel that has been sprayed with non-stick spray. Even the batter out and press to within 1/2″ of the edges of the skillet – the brownie will spread out, but leave the room between the batter and the sides of the skillet so the edges don’t over cook.
Top with remaining chocolate chips and toffee bits. Place in oven and bake for 25-30 minutes or until the edges are set and a toothpick placed in the middle of the brownie comes out clean.
Let the brownie cool on a wire rack in the skillet until just warm – about 45 minutes. It will still be very soft in the middle, but as it cools, the brownie will set entirely.
Drizzle with additional softened Nutella if desired, or ice cream!

Ingredients
Instructions
 Panzanella: it’s your excuse to eat bread and call it salad!
Ingredients
2-3 sweet peppers (red and/or yellow)
olive oil
sherry vinegar (or balsamic or white wine vinegar)
pinch of sweet or smoked paprika
toasted stale bread, rubbed w/ olive oil & garlic
1 cup cherry tomatoes
1-2 leaves of kale, torn
1/2 cup little mozzarella balls
1/4 cup chunky pickled onions (see below)
handful of torn basil
salt & pepper
pickled onions:
1 small red onion, sliced into thick strips
white wine vinegar (enough to fill the jar of onions)
a few pinches of cane sugar and salt
Instructions
For the pickled onions: (make in advance) pickle your onions by shaking all ingredients together in a jar. Chill until for at least an hour, or up to days (or weeks, really) in advance.
Slice cherry tomatoes and toss them with a splash of olive oil, a splash of sherry vinegar, salt, pepper.
Drizzle olive oil on your stale bread and toast (or grill) it until golden. While it’s still warm, rub it with a sliced clove of garlic, then slice it into bite sized pieces.
De-seed and slice your peppers into thick strips. Sautée them in a pan with olive oil until soft and lightly blistered. (you could also do this on a grill). Remove from heat, drizzle with a little sherry vinegar and a pinch of paprika.
Toss all salad ingredients together so that the juices from the tomatoes and the peppers create a light dressing. Drizzle with a little more olive oil. Taste, and add more salt and pepper to your liking. Let it sit for at least 10 minutes or so for the bread to soak up the juices. Serve at room temp.
Notes
Instead of pickled onions, you can also cook onions with your peppers. Use a yellow onion instead of a red one.
Vegan option: skip the cheese
Yield: serves 3-4 as a side
 These french toast roll ups are stuffed with one of the best flavor combinations out there – banana and nutella. They’re just sweet enough to eat by themselves, but you can always sprinkle them with cinnamon sugar or drizzle some syrup over the top if you want to go over the top.

1 kg sugar
250 gm salt
30 gm cumin powder
20 gm chilli powder
1 tsp turmeric
Mix all ingredients together and sun for a few days.
Stir off and on, till sugar dissolves and gets sticky. This should take about 5-7 days.
Key Ingredients: Turmeric, Salt, Sugar, Mango
 (NaturalNews) The term food preservatives sounds quite positive, and if you don’t look any deeper than the surface, it’s a good thing. It means the food that’s packaged in boxes, bags, jars and cans has a longer shelf life, before mold, mildew, bacteria and fungi kick into high gear and start breaking down the food, changing it’s structure, color and, most of all, its nutritional value. But look deeper, into the science of “preservatives,” and you will find some quite ominous information, and you will forever see the term as something that can affect your life expectancy and lead to something that starts with the letter “c” from which one in every three people suffer.
The same “preservatives” that prolong the shelf life of food also shorten human life. How? Human cells need oxygen. Certain preservatives choke your mitochondria, depriving them of oxygen.
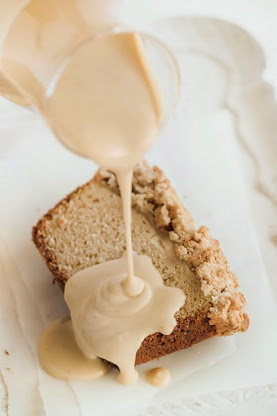 Apple Crumble Loaf with Brown Sugar Custard
(makes one medium loaf cake, serves about 8-10)
For the cake:
225g self-raising flour (about 1 & 3/4 cups)
125g butter, softened
120g sugar
2 eggs
1 tsp pure vanilla extract
2 tbsp milk
3 Granny Smith apples, peeled, cored and thinly sliced
1 tbsp brown sugar + 1/2 tsp ground cinnamon
For the crumble:
125g self raising flour (approx. 1 cup)
90g sugar
45g butter
1.5-2 tbsp water for mixing
1/4 tsp ground cinnamon
For the custard:
3 large egg yolks
75g brown sugar (about 1/3 cup packed, can replace with 75g golden syrup)
300ml pouring cream (about 1 & 1/4 cups)
150ml milk (about 1/2 cup + 1 tbsp)
1 vanilla bean pod or 1 tsp pure vanilla extract
Grease and line a 20cm x 10cm (8x4inch) loaf tin with baking paper. Prepare the cake batter; preheat oven to 180°C (350°F). Place sugar and butter in a large mixing bowl and beat with an electric mixer on high speed until pale and fluffy. Add eggs one at a time, then add vanilla and beating until combined. Reduce mixer speed to slow and gradually add flour and and milk and mix until just combined. Pour batter into prepared tin and smooth surface with a spatula. Layer apples slices over the top of the batter, there should be enough for two layers of slices. Mix brown sugar and cinnamon together in a small bowl and sprinkle evenly over the top of the apple slices.
Prepare the crumble; place butter, flour, cinnamon and sugar in a bowl and rub the mixture gently between the tips of your fingers to combine them, until the mixture resembles breadcrumbs. Gradually add a 1/2 tablespoon of water at a time, while still combining with your fingertips until the mixture starts to form fairly bit clumps of around 0.5 cm diameter, rather than fine breadcrumbs. I added about 2 tbps water.
Bake in oven for 50-60mins, or until a skewer inserted into the centre comes out clean and the crumble on top is golden brown. Remove from the oven and cool completely in tin. Serve while still warm (and should be heated before serving always).
Prepare the custard; place milk, cream and vanilla (pod split and seeds scraped) in a medium saucepan and bring just to the boil. Set aside to cool for a minute. Place egg yolks and sugar in a medium mixing bowl and whisk until pale and sugar has dissolved. While still whisking, gradually add hot mixture to the bowl until completely combined. Return mixture to the saucepan and place on low heat, stirring continuously. (And I mean continuously, unless you want to end up with scrambled eggs.) Stir until mixture thickens and coats the back of a wooden spoon. Remove from the heat and transfer mixture to a bowl. Cover surface of mixture with clingfilm to prevent a skin forming. Chill in the fridge until ready to serve.
Cut cake into slices and serve warm with custard or cream or ice cream. Trust me, it’s not even half as good at room temperature. Can be stored in an airtight container in the fridge for several days.

Did you know that Alzheimer’s is ranked as our #1 fear? As anyone over 40 knows forgetting things and feeling less mentally sharp often becomes an unavoidable side effect of getting older.
There are currently 3,000 food additives in the US food supply.
Click on the above image to read about the 5 that are killing your brain…
Serves 1
Prep time: 5 minutes
Ingredients
Directions
Pour water into a tall glass
Add the rest of the ingredients, and stir. Drink immediately.

On the jar of my yeast, it recommended checking 2 things: first, make sure you bring the yeast to room temperature before adding it and second, you can test to see if the yeast is still good by adding it to water & then adding sugar (check your labels).
You can mix it up a little by adding some parmasan cheese and dried rosemary to the top; check it, as it might require an additional 5 minutes bake time to bake-in the cheese and rosemary. A killer combination would be pairing this bread with a fine extra virgin Olive oil … or a selection of cheeses and a goblet of nice wine … to complete this little feast.
Ingredients:
4 Tbsps Sugar
2 Tbsps Butter (melted; can substitute with Vegan Butter)
3 tsps Kosher Salt
1 1/2 C hot water
2 Tbsps of rapid rise yeast*
5 Cups of flour (+ or -)**
Directions
Put all ingredients but the flour into the mixer (KitchenAid) and let sit for a few minutes so the yeast can do it’s thing. Add the flour in small batches and mix with a dough hook for 8-10 minutes. Remove and place in a bowl that has been greased. Let the dough rise until it doubles in size (about 30 minutes). Punch down the dough, then divide it in half into 2 rounds; place on a greased cookie sheet. Cut decorative slits on the tops of your dough rounds. Let the dough rise again. Rub an egg white wash (1 egg white + 1 tbsp water) over the top and sprinkle with Kosher salt. Add the dried rosemary and parmasan here. Bake at 400 degrees for 17-25 minutes.
*I used regular (non-rapid rise) yeast and so it took longer for the dough to rise- a few hours.
**You can also use wheat flour, or do half and half.
Ingredients:
3 ripe bananas
2 cups oats
1/4 cup peanut butter
1/4 cup cocoa powder
1/3 cup unsweetened apple sauce
1 tsp. Vanilla
Directions:
Preheat oven to 350 degrees F.
Mash bananas, then add the remaining ingredients. Stir and let sit for 20 minutes.
Drop by teaspoonful onto a greased cookie sheet. Bake 10-12 minutes.
Notes:
Like with any vegan cookie recipe, you have to mix the ingredients properly. Soak the oats in a 1/4 cup of almond milk while preparing the rest of the batter. Mash the Bananas first, then stir in the peanut butter, vanilla and applesauce. Add a 1/2 teaspoon of baking powder (recipe does not call for it, but it is a MUST), then the cocoa powder and, lastly, the oats. You may also want to add a couple drops of liquid stevia if you are using raw cacao powder, or if you prefer a sweeter cookie. Mix well and let the batter sit as directed, above.
As an option, you can soak a 1/4 cup of currants in water while the batter sits, then fold the currants into the batter after the batter has rested.
======
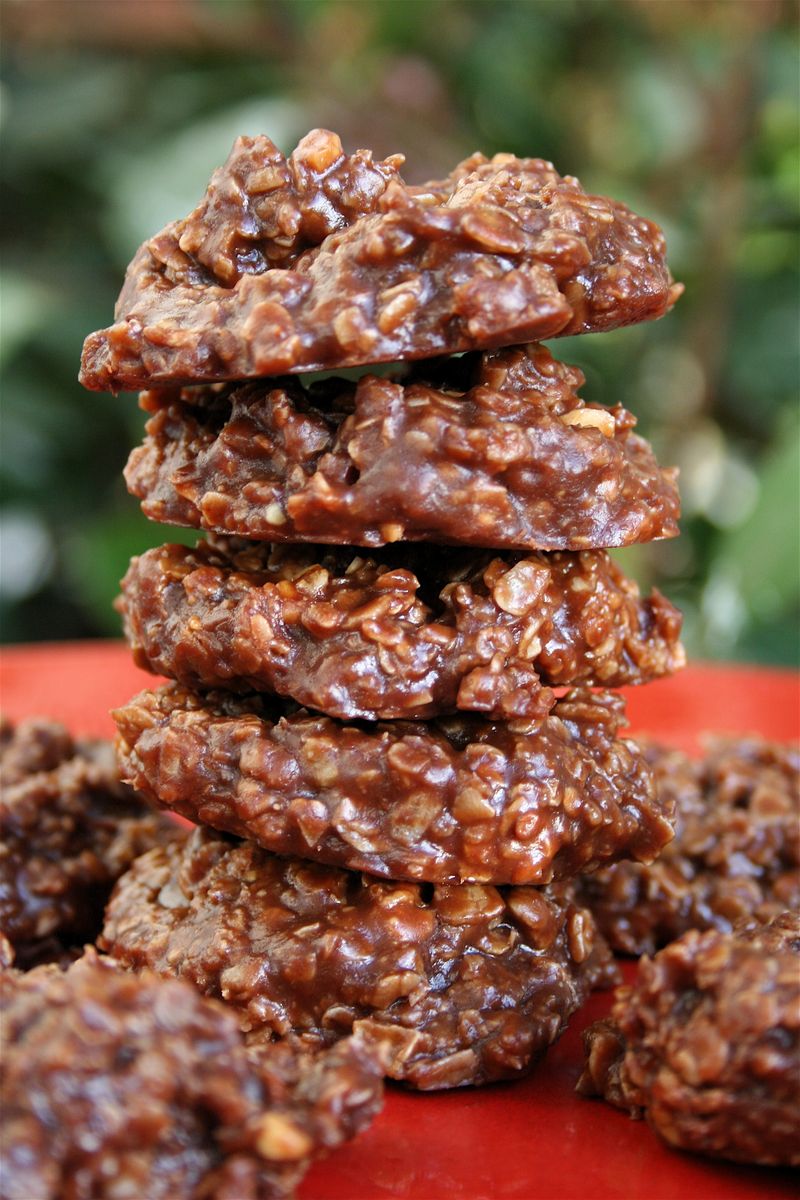
Alternate No-Bake recipe:
1/2 C Butter
2 C Sugar
1/2 C Milk
4 Tbsp Cocoa
1/2 C Peanut Butter
3- 3 1/2 C Quick cooking Oats
2 tsp. Vanilla
Add the first 4 ingredients in a saucepan. Bring to a rolling boil, and boil for 1 minute. Stir in the next 3 ingredients and drop onto wax/foil paper. Let cool until set. I would suggest putting them in the freezer for an hour.
Enjoy!
 Pizza CAN BE healthy! If you cut this crust into 8 slices, each piece of crust (without toppings) has only 50 calories, 2 carbs and 5 grams of protein! There’s no need to feel guilty about eating a few slices, several times a week!!

For quinoa cakes
For topping
Make quinoa cakes:
Bring water and 1/2 teaspoon salt to a boil in a heavy medium saucepan.
Meanwhile, wash quinoa in 3 changes of water in a bowl, then drain well in a fine-mesh sieve.
Stir quinoa into boiling water and return to a boil, then simmer, covered, until quinoa is dry and water is absorbed, 20 to 30 minutes. Remove from heat and let stand, covered, 5 minutes. Transfer to a large bowl and cool, stirring occasionally, 10 minutes, then stir in egg.
Line a baking sheet with plastic wrap and lightly brush with oil. Lightly oil a 1-cup dry-ingredient measure. Pack enough quinoa into measure with a rubber spatula to fill it two-thirds full. (If spatula becomes sticky, dip in water.) Unmold onto baking sheet and gently pat quinoa into a 4-inch-wide patty with spatula. Make 3 more quinoa cakes, brushing measure with oil each time. Chill cakes, uncovered, at least 15 minutes.
Make topping while quinoa cooks and chills:
Toss eggplant with 1 teaspoon salt in a colander and drain 30 minutes. Squeeze handfuls of eggplant to extract liquid, then pat dry.
Cook eggplant, onion, garlic, oregano, and 1/4 teaspoon each of salt and pepper in oil in a 12-inch heavy skillet over medium heat, covered, stirring occasionally, until softened, about 5 minutes. Stir in tomatoes, roasted peppers, and water and simmer, covered, stirring occasionally, until eggplant is very tender and mixture is thick (if dry, thin with a little water), about 10 minutes.
Cook quinoa cakes:
Heat 2 tablespoons oil in a 12-inch nonstick skillet over medium heat until it shimmers. Carefully add quinoa cakes and cook, turning once carefully and adding remaining 2 to 3 tablespoons oil, until crisp and golden, 8 to 10 minutes total (pat cakes to reshape with cleaned rubber spatula while cooking if necessary). Transfer to plates.
To serve:
Return eggplant ragù to a simmer and stir in parsley and half of mozzarella, then simmer, stirring, until cheese just begins to soften, about 30 seconds. Spoon over quinoa cakes, then sprinkle with remaining mozzarella.
Cooks’ notes:
·Quinoa cakes can be formed 1 day ahead and chilled, covered.
·Eggplant-tomato ragù, without parsley and mozzarella, can be made 1 day ahead and chilled, covered.
Chef Miyoko Shinner gives us a first hand approach on making an incredible vegan mozzarella that is tasty and very versatile. This recipe is from her cookbook Artisan Vegan Cheese and can be downloaded at http://www.artisanveganlife.com/ .
San Francisco Vegan Chef Miyoko Shinner has been making vegan butter substitutes of various sorts for a couple of decades. This one is true perfection. Try it and see. Go to http://www.artisanveganlife.com/ to get the latest recipe.
 Makes 6 servings
1 tablespoon vegetable oil
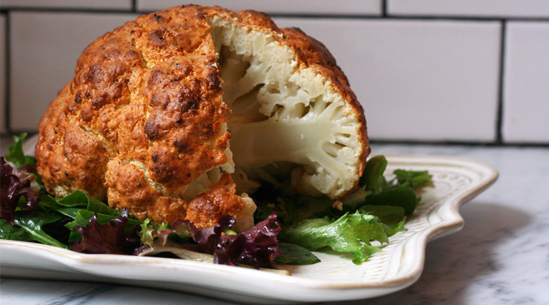
1 head cauliflower
1½ cups plain Greek yogurt
1 lime, zested and juiced
2 tablespoons chile powder
1 tablespoon cumin
1 tablespoon garlic powder
1 teaspoon curry powder
2 teaspoons kosher salt
1 teaspoon black pepper
1. Preheat the oven to 400° and lightly grease a small baking sheet with vegetable oil. Set aside.
2. Trim the base of the cauliflower to remove any green leaves and the woody stem.
3. In a medium bowl, combine the yogurt with the lime zest and juice, chile powder, cumin, garlic powder, curry powder, salt and pepper.
4. Dunk the cauliflower into the bowl and use a brush or your hands to smear the marinade evenly over its surface. (Excess marinade can be stored in the refrigerator in an airtight container for up to three days and used with meat, fish or other veggies.)
5. Place the cauliflower on the prepared baking sheet and roast until the surface is dry and lightly browned, 30 to 40 minutes. The marinade will make a crust on the surface of the cauliflower.
6. Let the cauliflower cool for 10 minutes before cutting it into wedges and serving alongside a big green salad.

Ingredients:
Directions:
Ingredients:
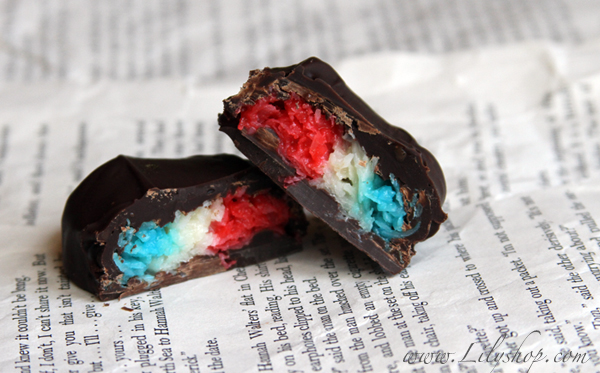
(1) 7 oz bag sweetened shredded coconut
7 oz sweetened condensed milk
(1) 12 oz bag dark chocolate chips
Food Coloring
Directions:
1. Combine one 7 oz bag of sweetened shredded coconut with 7 oz of condensed milk. Mix well.
2. Separate your mixture into 3 different bowls. Put the same amount in each bowl and add red food coloring to one bowl and blue to the other. The white obviously stays as is. The blue will only need about 2 drops but the red will require more otherwise it will be pink. If you have food coloring gels these work well. Refrigerate all the mixtures for 1 hour.
3. Remove your bowls from the refrigerator and start preparing 2 inch mounds on a lined baking sheet. I think it’s best to use a Silpat but if you do not have a Silpat, use wax paper. I did one color at a time then washed my hands and moved on to the next color so the colors did not bleed together.
4. Using a damp paper towel, cover your bars and shape them with your hands. Refrigerate for another 2 hours.
5. Once your bars are completely cold you need to melt your dark chocolate chips in a double boiler or in the microwave. Now there are two ways to melt your chocolate. If you melt your chocolate in the microwave at 30 second intervals (stirring in between) like I normally tell you to do, your chocolate will be more soft and malleable; meaning, if you leave these these candies out all day, the chocolate will start to melt a bit and it will get all over your hands. If you want your chocolate to be hard (like when you buy a box of candy) you will need to temper your chocolate. Once your chocolate is melted you will want to dip your bars into the melted chocolate and place back on the lined tray. This is totally messy and there is no other way to do it. Refrigerate for another 2 hours.
Tip: If you want your bars to look smoother you can dip them again and do a second coating of chocolate and then refrigerate once again. The bars pictured here were double-dipped. Enjoy!
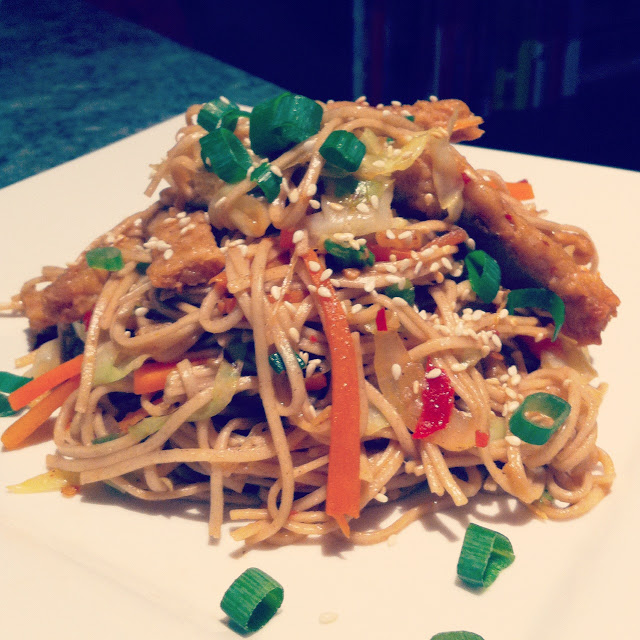
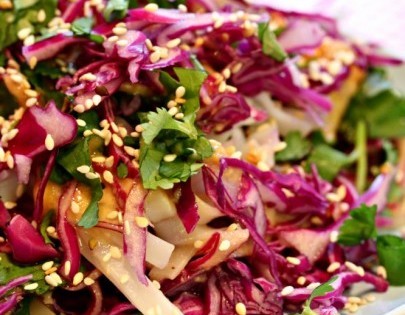
Lana made this dish for her parents and housemates, and it was a HIT!
Do you know what we really like? Soba noodles. And Japanese food. And putting cabbage in things.
Cabbage is so underrated.
We are also not very fast at julienning carrots, and they’re most certainly not the most evenly-cut thing we’ve ever produced, but we really like how everything is long and skinny in this dish. Normally we would be carrot coins all the way!
We like to keep this pretty simple, but it can be doctored to your liking. Lana has added Fry’s chicken-style strips to the one in the picture here, but we didn’t like them and picked them out. We bet it would be better with tofu, and we can’t believe we just said that. The Vegan chickin strips work great; so does the Vegan “beef” strips, so try it and enjoy. Anyway, here’s a basic recipe to get you started:
Serves 4
Ingredients:
soba noodles
2 carrots, julienned
1/2 head cabbage, sliced thinly
2 cloves garlic, minced
4 green onions/scallions
1/2 cup soy sauce
2 tbs sambal oelek or other chili
1 tbs sugar
toasted sesame seeds
Directions:
1. Saute the carrots, cabbage, garlic and light-green part of green onion/scallion over medium heat 5 minutes or until soft and beginning to brown.
2. Meanwhile, cook your soba noodles in boiling water 2 minutes, then drain and refresh.
3. Add noodles to veggies, turn heat down and add combined soy, chili and sugar.
4. Turn up to re-heat without boiling the crap out of your sauce, and serve topped with toasted sesame seeds.
If using tofu or other chicken substitute, cook them before the veg, set aside and add to the pan again when you add the noodles.
YUM!

(Makes about 6 servings in 6 ounce glasses, or 4 servings in 10 ounce glasses)
Ingredients:
16 fl oz whipping cream, cold
2 tablespoons sugar
2 (16 ounce) tubs all natural Belgian chocolate pudding*, divided use
24 all natural chocolate-vanilla sandwich cookies*, crushed into chunky consistency
1 (1ounce) square semi-sweet chocolate, to shave for garnish
Preparation:
-In the bowl of a mixer (or using a hand-held), add the cold cream and begin whipping; once thickened slightly, sprinkle in the sugar and finish whipping just until stiff peaks form; set aside for a moment.
-In medium-large bowl, add 2 cups of the chocolate pudding (reserving the remaining pudding) and begin adding the whipped cream to it in several increments, gently folding in to keep a fluffy and light consistency, as this is the “chocolate mousse” part of the dessert; once all whipped cream is incorporated, set aside and prepare glasses.
To Assemble (for 6 servings in 6 ounce glasses):
-Begin by adding equal amounts of the crushed cookies to the bottom of each glass (about 3 tablespoons), next a layer of chocolate pudding (about 3 tablespoons), and next a layer of the “chocolate mousse” (about 3 tablespoons); repeat this process again for each glass, with another layering of crushed cookies, then the pudding, then the “chocolate mousse”, finally finishing with a final sprinkling of crushed cookies and a decorative dollop of “chocolate mousse”; garnish by shaving a little of the semi-sweet chocolate square with a vegetable peeler over the tops of each glass; refrigerate until ready to serve, or serve immediately.
To Assemble (for 4 servings in 10 ounce glasses):
-Follow assembly instructions above only increase the quantity of each layer to about 5 tablespoons in order to fill each glass.
*Trader Joe’s “Belgian Chocolate Pudding” (or any “ready made” chocolate pudding) and “Chocolate-Vanilla Bean Joe-Joe’s” Sandwich Cookies.

Most people think that eating fruit along with their main meals is a good way to stay healthy. However, without properly understanding the body’s digestive cycle over a 24 hour period, many people consume fruit in a manner that will bring them little nutritional benefit. Let’s examine this notion more closely.
Having lots of fruit with your main meals, or eating it as a desert after meals, is not the ideal way fruit should be eaten.
Below are good guidelines for giving your body the maximum nutritional benefit from eating fruit.
Always eat fruit on an empty stomach. You can do this at any time during the day, as long as it is on an empty stomach.
After eating fruit, wait at least 30 minutes before consuming other foods besides fruit.
After you have had a proper meal, leave at least three hours before you eat any fruit. This will ensure that the previous meal has left the stomach and putrefaction and fermentation of that meal in the stomach can be avoided.
For maximum benefit, consume mainly fruit before noon.
Never eat fruit along with other foods. Fruit should only be eaten on its own.
Never eat fruit as a dessert, after a meal. Your meal is often composed of dense, complex carbohydrates and proteins. Fruits are lighter and digested faster than denser foods, consequently, they do not get digested well after your stomach is already working on pasta, rice, meats and the like. Therefore, you waste much of the opportunity for the body’s maximum absorption of the fruit’s nutritional benefits when making fruit your dessert.
Avoid fruits like bananas and avocados in the morning because they are heavy foods and tax the digestive system in the morning. These can be eaten after noon, when the body is in the appropriate digestive cycle for such foods to be eaten.
If you feel hunger during the morning, eat fruit and keep eating portions of fruit until your blood sugar level goes back to normal and your hunger disappears.
Eat only organic fruit … to the best of your ability to find authentically organic.
Avoid processed, cooked, or canned fruit. These contain large amounts of sugars, additives and other undesirables.
Fruit is digested in the intestine and not in the stomach. Fruits are rapidly digested and go through the digestive system in approximately 30 minutes.
The brain runs on glucose. Fruit is the most efficient source of blood sugar. With sufficient fruit consumption your blood sugar levels normalize, allowing your body’s hunger mechanism to be properly regulated, thus circumventing over-eating and obesity.
 This vegan avocado mousse is super simple to make and totally delicious. Full of healthy fats to support the nervous system, it also gives you beautiful skin and hair. I love it as breakfast but it can also be a great healthy, sugar-free treat.
What you need
1/2 ripe avocado
1/2 cup young coconut flesh
Caco nibs for topping (optional)
What you do
– Blend all your ingredients in your hight speed blender.
– Add a dash of filtered water or coconut water if needed.
– Pour in a nice glass and garnish with some cacao nibs or and chocolate chunks.
Note: If you’d like a sweeter taste, you can add half a banana to the preparation or any sweetener of your choice.

Yeah, you heard that right. Chocolate Martini Pudding Pops. Bring on the heat. Bring on the raging dog days of summer, the long mountain bike rides, and all the sweat. Because when you have a batch of these rich chocolate frozen treats waiting for you at home, it’s all worth it.
Ingredients:
1 3.9oz package jello
1 cup whole milk
1 cup heavy cream
1 tbs Godiva liqueur
3 tbs vodka
Preparation:
In a large mixing bowl, whisk together the pudding, milk, cream, Godiva liqueur, and vodka.
Carefully portion mixture into popsicle molds, filling each three quarters of the way full.
Place in freezer for one hour, or until slightly firm and add craft sticks in the center of each pop and et freeze overnight, or until solid.
When it comes to purchasing food, protecting our bodies often goes hand-in-hand with protecting the environment … so if you follow a few simple rules, everyone wins!
Here are ten shopping rules that will boost your health and cut down on damage to the environment:
1. Eat at home instead of eating out.
Most eating establishments don’t use quality ingredients to prepare their food. The majority use genetically modified ingredients (GMO), with pesticides and chemicals and “bad oils.” For example, restaurants will use vegetable, canola, corn, cottonseed oil (usually GMO), peanut oil, hydrogenated oil, and palm oil. In order for the restaurants to make a profit, they usually buy the cheapest ingredients available. Concern for your health is not one of their top priorities. Eating out should be a “treat” and a cautious exercise in moderation.
2. Purchase ingredients and brands that care about you and about the environment.
Avoid, or at the very least minimize, your intake of ingredients and foods that have GMOs, are riddled with pesticides and chemicals, have monosodium glutamate (MSG), aspartame, artificial flavors, artificial sweeteners and colors, and any other ingredients you don’t recognize or are unable to read. These are all toxic ingredients.
Brands that contain these ingredients don’t care about your health. They care only for their bottom line. Also avoid brands that usually advertise on TV. In most cases, these brands contain GMO, chemicals and pesticides.
3. Buy locally grown ingredients.
Buying from the local farmers markets is not only a fun adventure, but an opportunity to buy directly from the grower, who will be there to field questions about whether their ingredients contain any harmful add-ons. Buying at the local markets means you’ll also be supporting local farmers!
4. Stop or minimize your intake of processed food.
When we make a daily choice of eating processed foods and supporting the companies who make the products, we’re directly contributing to factory farmed animals, caged chickens and ultimately contributing to the destruction of our environment. Many of these foods are also riddled with the GMOs, pesticides and chemicals.
5. Write to the government and ask them to stop feeding us toxic food.
If you care about your health, why not write to your local representatives or even the major food safety agency in your country (such as the U.S. Food and Drug Administration) and ask them to stop the use of chemicals and pesticides in our food, to stop the approval of the use of GMO ingredients in our food; to stop the toxic fluoride in our water and foods, to stop the use of other dangerous ingredients in our food.
Let them know that you value your health and that truthful and genuine food safety is important to you. You no longer want to be a part of their experiment.
6. Drink less sodas and sweet drinks or eliminate them from your diet.
Most sodas and sweet drinks, especially diet and sugar-free drinks, contain many chemicals. Most of these drinks contain harmful chemicals such as aspartame, white processed sugar, high-fructose corn syrup, artificial colors and other chemicals.
7. Minimize or eliminate your intake of meat, fish and poultry.
Meat and poultry contain high levels of antibiotics that are injected into the animals. These animals are also mostly fed grains and corn (likely, GMO) to make them fat more quickly and ready for sale. In their natural environment, they eat grass and not grains. They’re factory farmed in small, confined spaces and not treated with respect and love.
We then ingest the entire animals and everything it was treated with, including the antibiotics, cruelty, pain, toxic grains, toxic corn, toxic soy into our bodies which, ultimately affects our health. Always choose certified organic.
8. Avoid buying and eating farm-raised fish.
Companies produce farm raised fish to make a profit. These fish are fed unnatural feed that could include GMO ingredients to fatten them up quickly and they can be highly toxic compared to their wild counterparts.
9. Stop buying unhealthy oils.
Eliminate vegetable, canola, corn, cottonseed oil (usually GMO), peanut oil, hydrogenated oil, and palm oil. These bad oils are detrimental to your health. Ensure you use good oils, such as extra virgin olive oil and coconut oil. By avoiding some of the bad oils, like palm oil, you are also minimizing the destruction to the environment.
10. Learn to read and understand product labels.
Make a point of knowing what’s in your food and where your food comes from.
Most labels are aimed at deceiving and confusing people. If you don’t recognize the ingredient, or you can’t pronounce it, then it probably isn’t good for you.
Avoid labels that also claim to be fat free, sugar free etc. Fat free or low-fat doesn’t mean it’s healthy. Many of these products are loaded with sugar and chemicals like aspartame.
Also exercise caution with labels that say, “made from imported ingredients.” These labels often use toxic ingredients. Only buy products that are truthful and clear about the country of origin, so you’re therefore able to investigate that country’s methods and food practices.

Asian style sandwiches are one of my family’s favorite foods. However, having a vegan daughter makes going out to enjoy them a little tricky. So, when I found this mouth-watering Asian street sandwich recipe, I knew I could easily make it into a vegan-friendly meal.

Substituting hoisin sauce for the oyster sauce makes the marinade vegan. The flavor of the hoisin sauce is less smoky when compared to the oyster sauce; however, the finished product still has the perfect blend of sweet, salty, spicy and umami. I made double the amount of marinade so that there would be enough to cover both pork and tofu.

The savory marinade transformed humble tofu into a luscious filling. Simply fry thinly sliced firm tofu until crisp, and slather with the marinade. The result is full of robust flavor and a really appealing texture. My vegan daughter thought it was delicious and requested that I make more so that she could enjoy it over white rice the next day.

The savory proteins of these sandwiches are perfectly contrasted by the fresh vegetables. Along with the sweet marinated cucumbers, herbaceous cilantro and cool crisp lettuce, I also added bean sprouts and sliced fresh jalapenos and scallions. The cucumber, lettuce and sprouts cooled the palate while the jalapeno and scallions add an element of spice and crunch. Piled high and slathered with the sriracha mayonnaise, these sandwiches will take you on a culinary trip to an exotic land.

Directions:
If not serving noodles right away, refrigerate until ready to serve. If sauce on noodles gets too thick to serve, add 1 to 2 tbsp. hot water, mixing or tossing well.
http://www.simpledish.com/recipes/dinner/ginger-peanut-noodles
Find Your Magic
Tarot Readings, Inspiration, and Self-Empowerment
Making life on earth magick one moon phase at a time.
Astrologer ~ Mystic ~ Writer
of the Collegium Spiritus Sancti, a Golden Dawn Society
An affiliate of the Alpha et Omega Order of Melchizedek
All Knowledge Is Not Contained In Only One School
Connecting the grant community to #LearnGrants
Channelings & Articles
Magic Spell Books & Grimoires
Native Hawaiian Language Revitalization
Poetry & Tales of Love, Mystery, Magic and Spirituality
Organic Herbs, Herbals, Sustainable Gardening
Mother Nature: Feeding The Mind, Body & Soul, with Food, Medicine & Skincare.
"Inheritor of a Dying World, we call thee to the Living Beauty. Wanderer in the Wild Darkness, we call thee to the Gentle Light..."
Time is the most important thing we've been given
Embracing the Divine Within.
"...That I should bear witness to the truth." - John 18:37 // David E. Robinson, Publisher
